Saving your edited photos
Saving your edited photos
What's coming up?
In this activity, you’ll learn how edited photos get saved as a copy of the original. This way, you can always go back to the original if you decide you don’t like the edited version.
Start activitySaving edited photos using the Photos app
Once you’ve worked on a photo in a photo editor, the way you save that photo can be different, depending on the editor you use.
On your Windows or Apple computer, the Photos app will save your edited photo as a new photo file, by default.

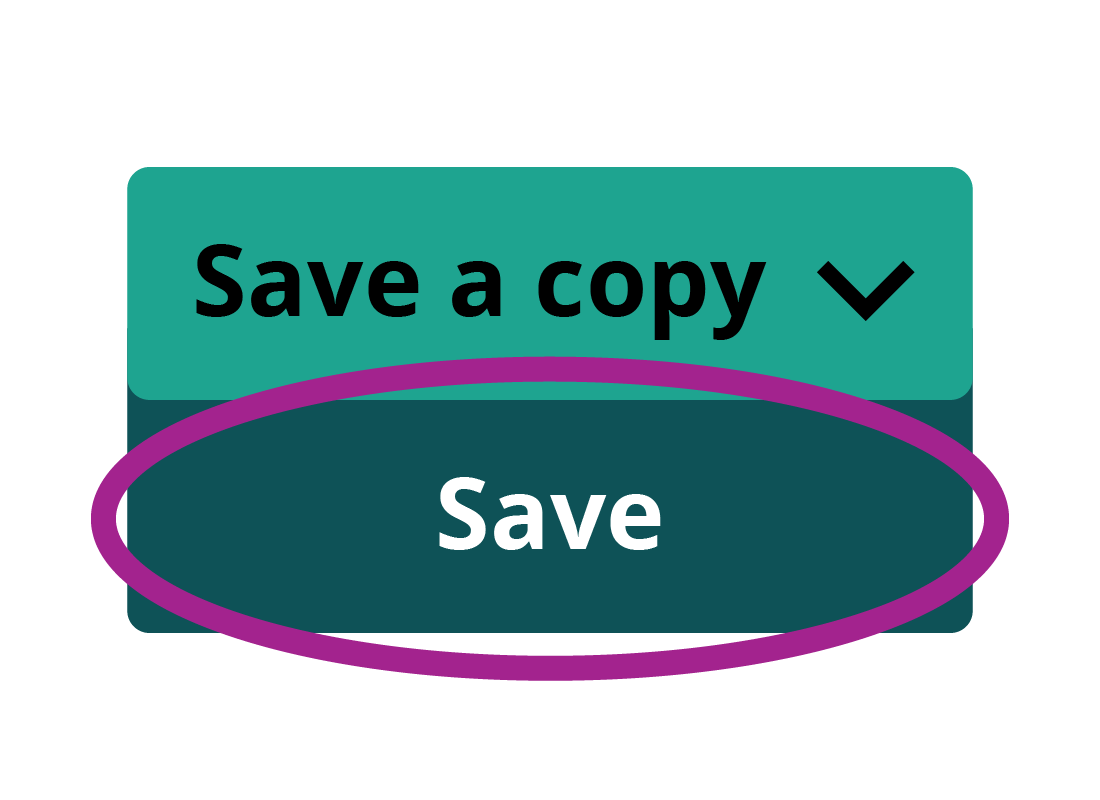
You can save over the original if you want
If you do want to save over the top of the original, so the original photo is gone forever and only the edited version remains, you can do this.
At the bottom of the panel in the Photos app where it says Save a copy, click on the little arrow to reveal more options. A Save option will appear. Click this to save the edited image and replace the original.
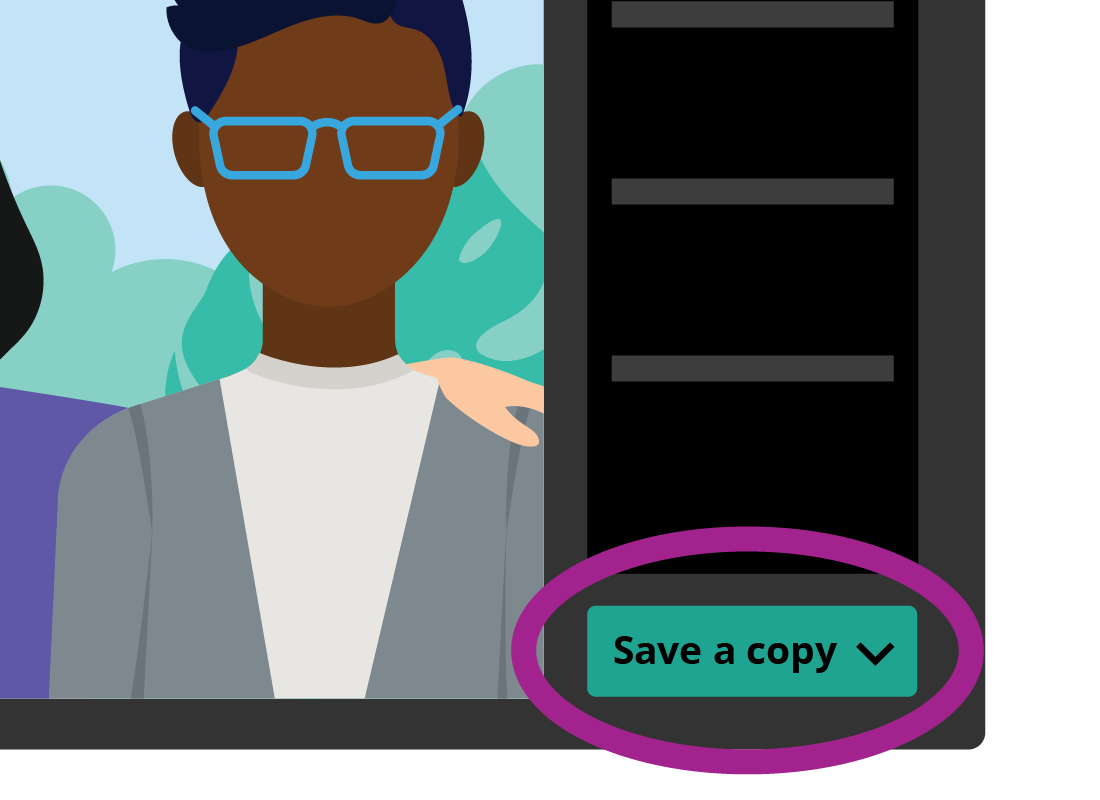
Using the Save a copy option
You can change the file type of your photo by using the Save a copy option.
When you have finished editing your photo and are happy with the results, click Save a copy in the bottom of the panel. Another panel will appear, ready for you type in a new file name and choose a file type for the photo.
On advanced and online editors, Save a copy is called Save As. You can find Save As in the File menu at the top of the screen.
Keep an eye on file types
For online or other advanced editors, you might find that they want to save your photo using a proprietary format. That means a file type that can only be used by that particular editor.
This makes it easier for that particular editor to do more edits to that photo later, but it can mean you won’t be able to view the photo anywhere except in that editor.
Depending on where you want to use the photo next, it might be better to save your photo in a more common format, such as JPG or PNG.
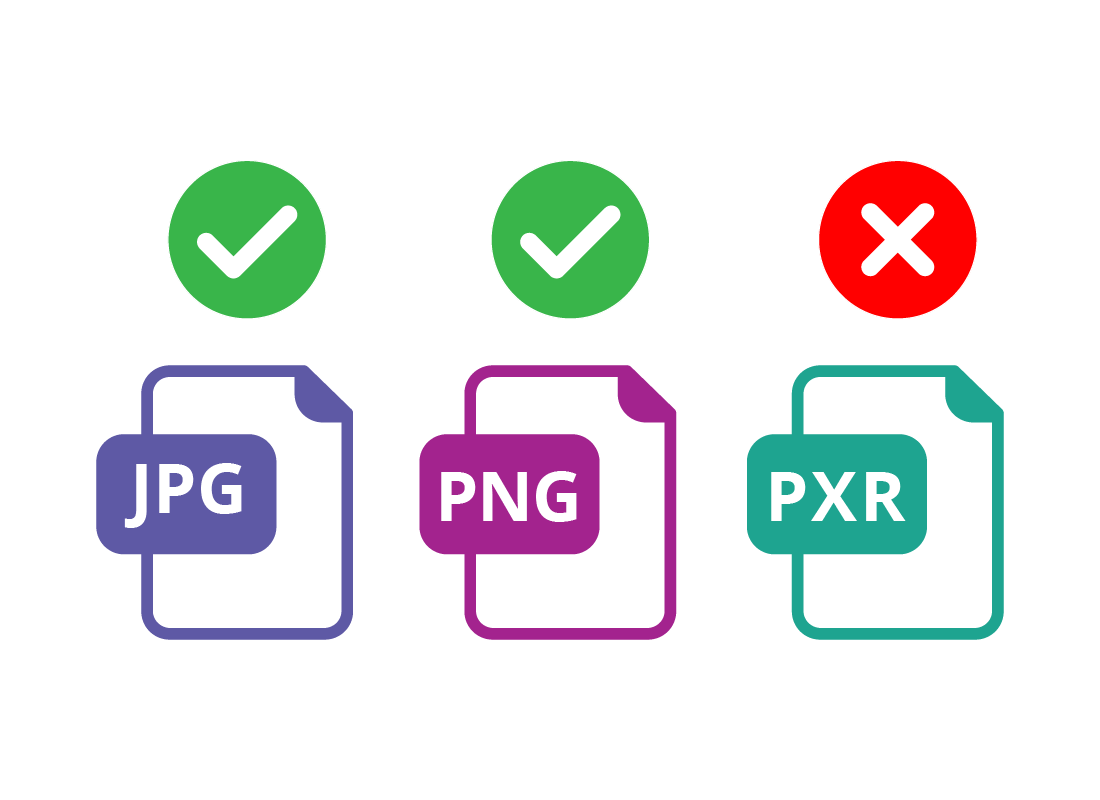
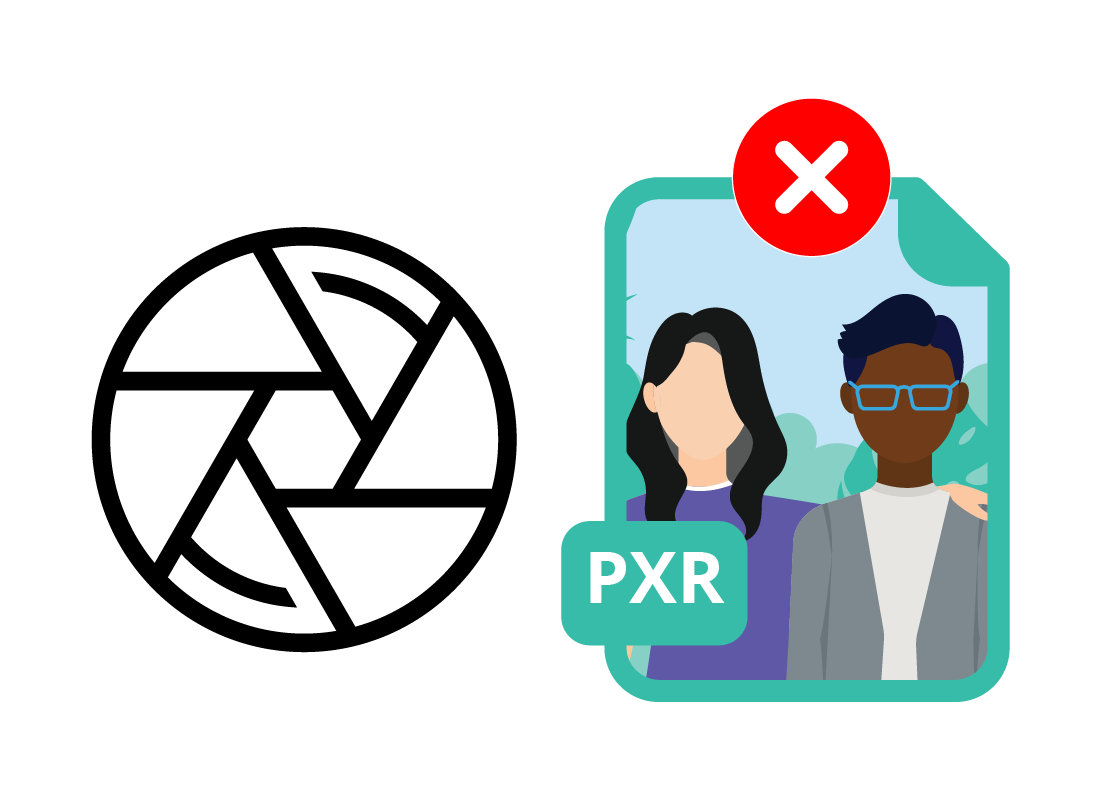
An example of a proprietary file type
The online editor Pixlr has lots of great tools to edit photos, and it’s free.
When you save and download your photo, be careful not to select the PXR file type. Any photo saved with this file type can only be opened using Pixlr, and won’t work in your computer’s Photos app anymore.
Instead of PXR, choose JPG, which is the best file type for family photos available on Pixlr.

eSafety tip
Some online editors keep your edited photos in what’s called a cache, so you don’t need to upload them each time you want to make an edit.
You can ask to clear this cache using the online editor’s menu, and then following the on-screen instructions.
Reputable online photo editors do not let their staff see your photos, and don’t keep your photos or sell them to advertisers. But for peace of mind, it’s safest to clear the cache each time you finish editing a photo online.
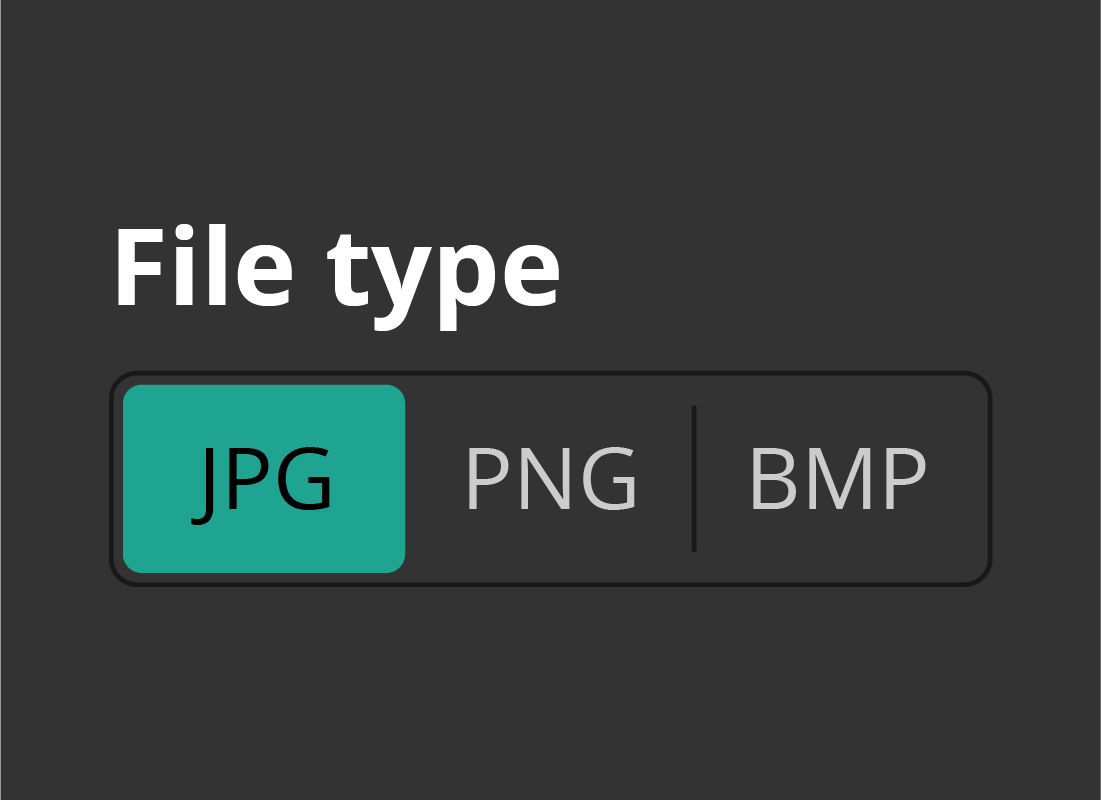
More about photo file types
When you use Save a Copy or Save As to save an edited photo, you can see lots of options for photo file types to choose from.
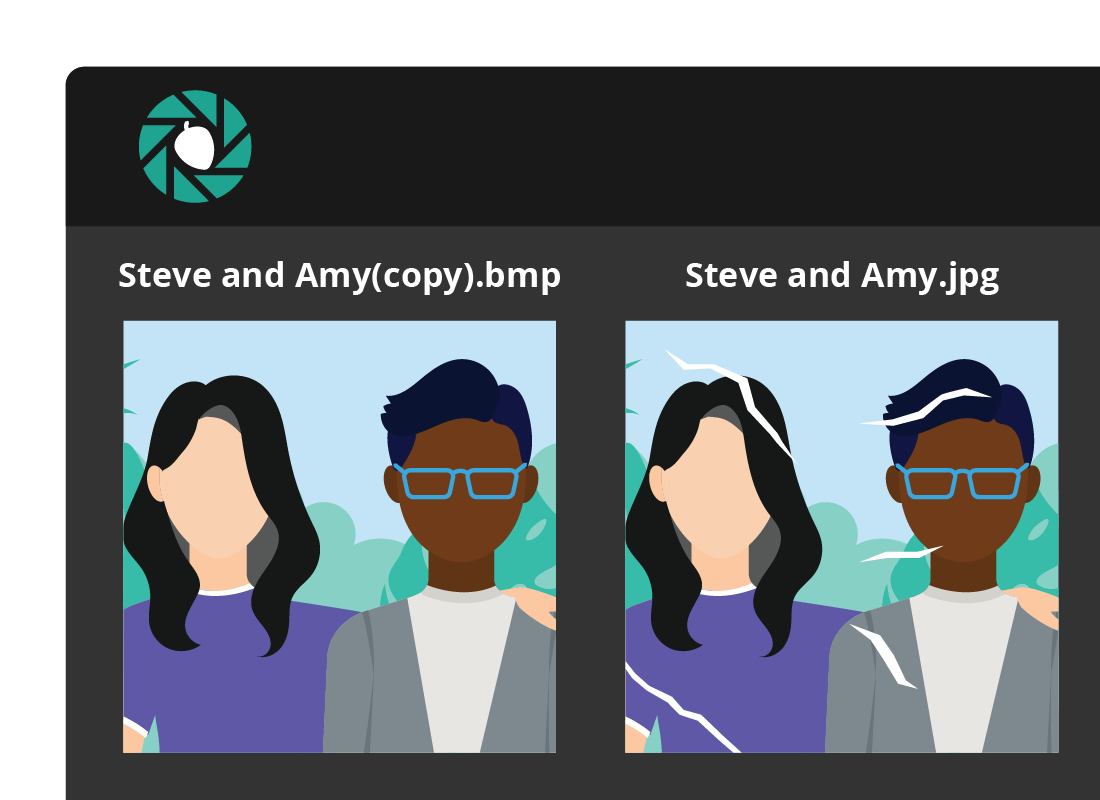
The best file types for a family photo are JPG and BMP. BMP is a much larger file, but is usually better quality than a JPG, and suited for printing at larger sizes. However, a JPG still looks good and is suitable for smaller prints and viewing the photo online.
You can find out more about photo file types in the Understanding image properties course earlier in this topic.
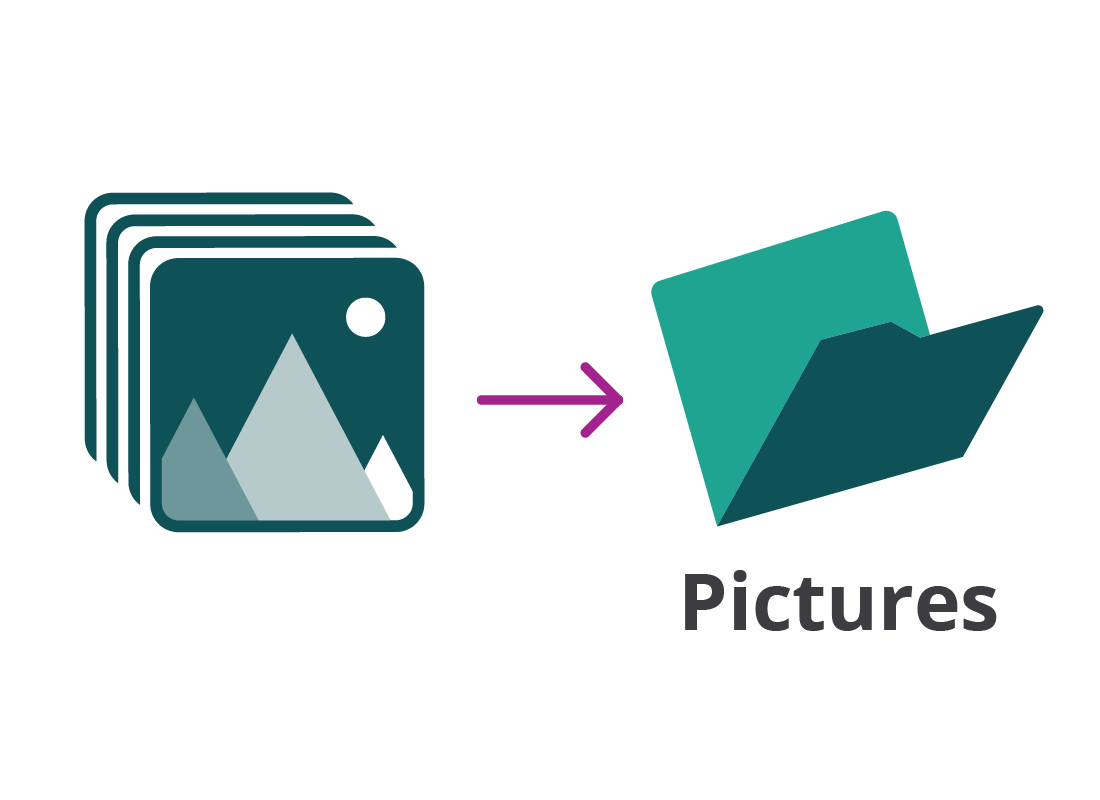
Save your photos to the Pictures folder
When you save an edited photo, it’s best to put it in the special Pictures folder on your computer’s hard disk. This means your computer’s Photos app will be able to find, organise, and display the photo.
This works even for photos you have edited in an advanced or online editor. Just click the Download button and save the edited photo to your Pictures folder.
Well done!
Congratulations, this is the end of the Saving your edited photos activity, and the end of the course.
If you’re a registered user, you can now complete a short quiz to test your learning. If you’re not registered, this is now the end of the All about photo editors course.